Upcycle your Rock Tee!
I love making these, they’re super easy, and fun for little ones.
We customised this one with some leftover scraps of double gause, but anything you can think to add such as a badge motif, or some glitter fabric pens can go down a treat, especially if your little one if like mine and loves a bit of sparkle!

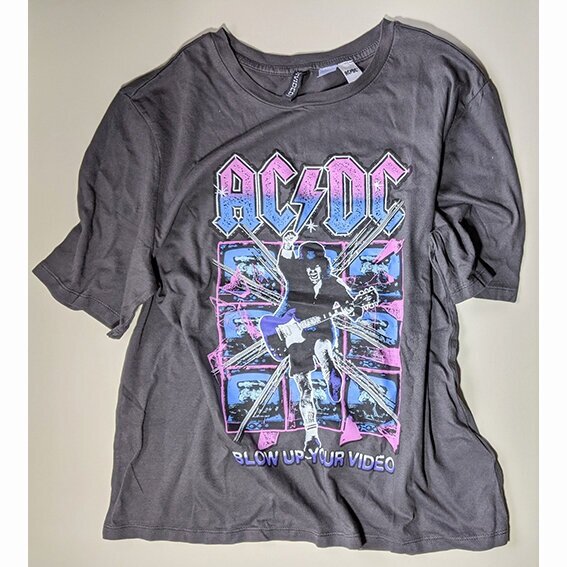
First things first you need to find an old tee of yours.
Ideally you want one that isn’t failing apart, but it is nice to find one that has a bit of meaning to you, perhaps evokes a memory, and definitely isn’t going to be worn again.

We suggest using a tee that your intended recipient wears currently, and one that has room for growth.
I found one of Edie’s that is a bit oversized so hoping this will last her a while! Its a good idea to note the key measurements here, in case you want to check your sizing as you go:
CF, CB, Chest/Waist circumference, Hem circumference, Front & Back neck drop, Neck to neck point, Shoulder, Neck Circumference, Sleeve length & Sleeve opening.

Once you have the measurements you need, you need to cut your tee up at the side seams, shoulder seams and underarm sleeve seams. This will give you flat pieces of the front, back and sleeves to use.

Place the tee onto the front piece of your old tee. I love doing this on a slight angle so the print is off center, and the slogan/print ends up slightly cut off, but if preferred go for a lined up, central placement.
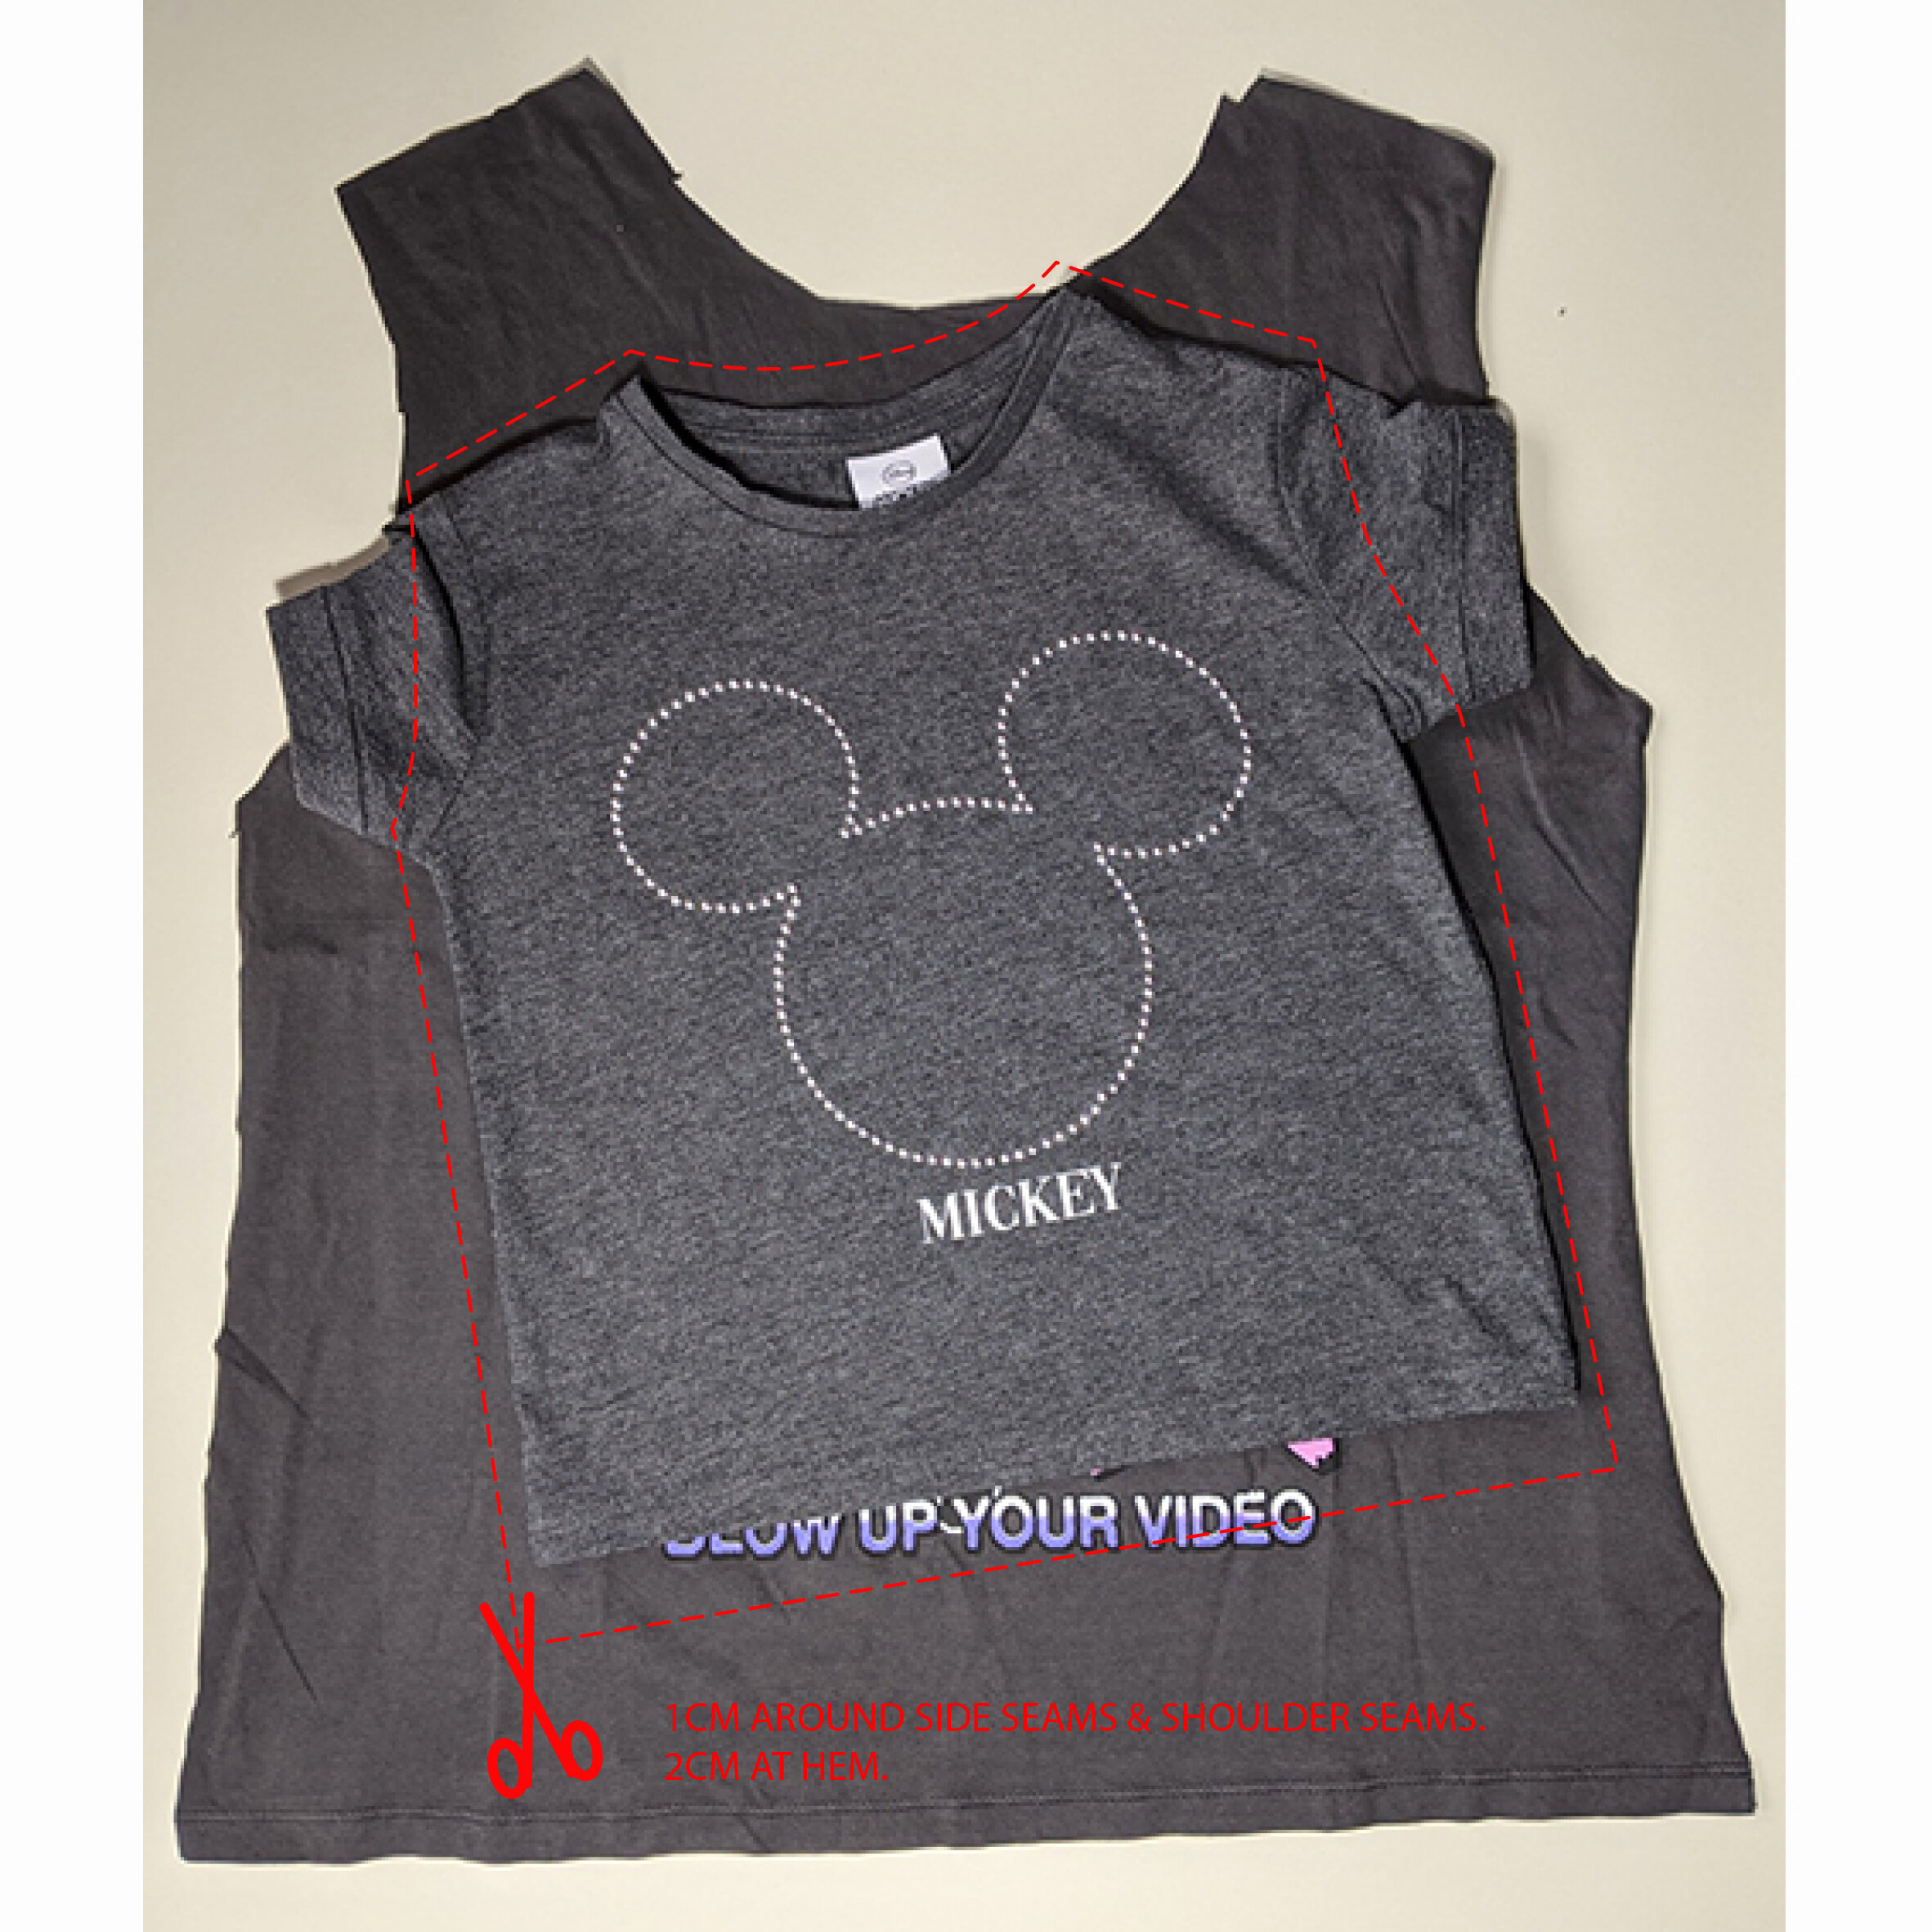
Next you need to cut around the t-shirt shape, allowing an extra 1cm for seam allowance, and 2cm at the hem (unless you plan to add a trim/peplum like we have.) For now, cut generously around the armhole and neckline as we will neaten this up next.

To create the neckline and armhole shaping, we recommend pinning or drawing in the seam line to mirror your existing tee, see armhole photo above. Once you have done this, remove the sample tee and trim away the excess, making sure you include 1cm Seam allowance.
Once this is done you can fold the piece at the CF and trim away the other side to match. The same goes for the neckline.
Repeat this process on the back piece. Then sew front and back shoulders and side seams together.
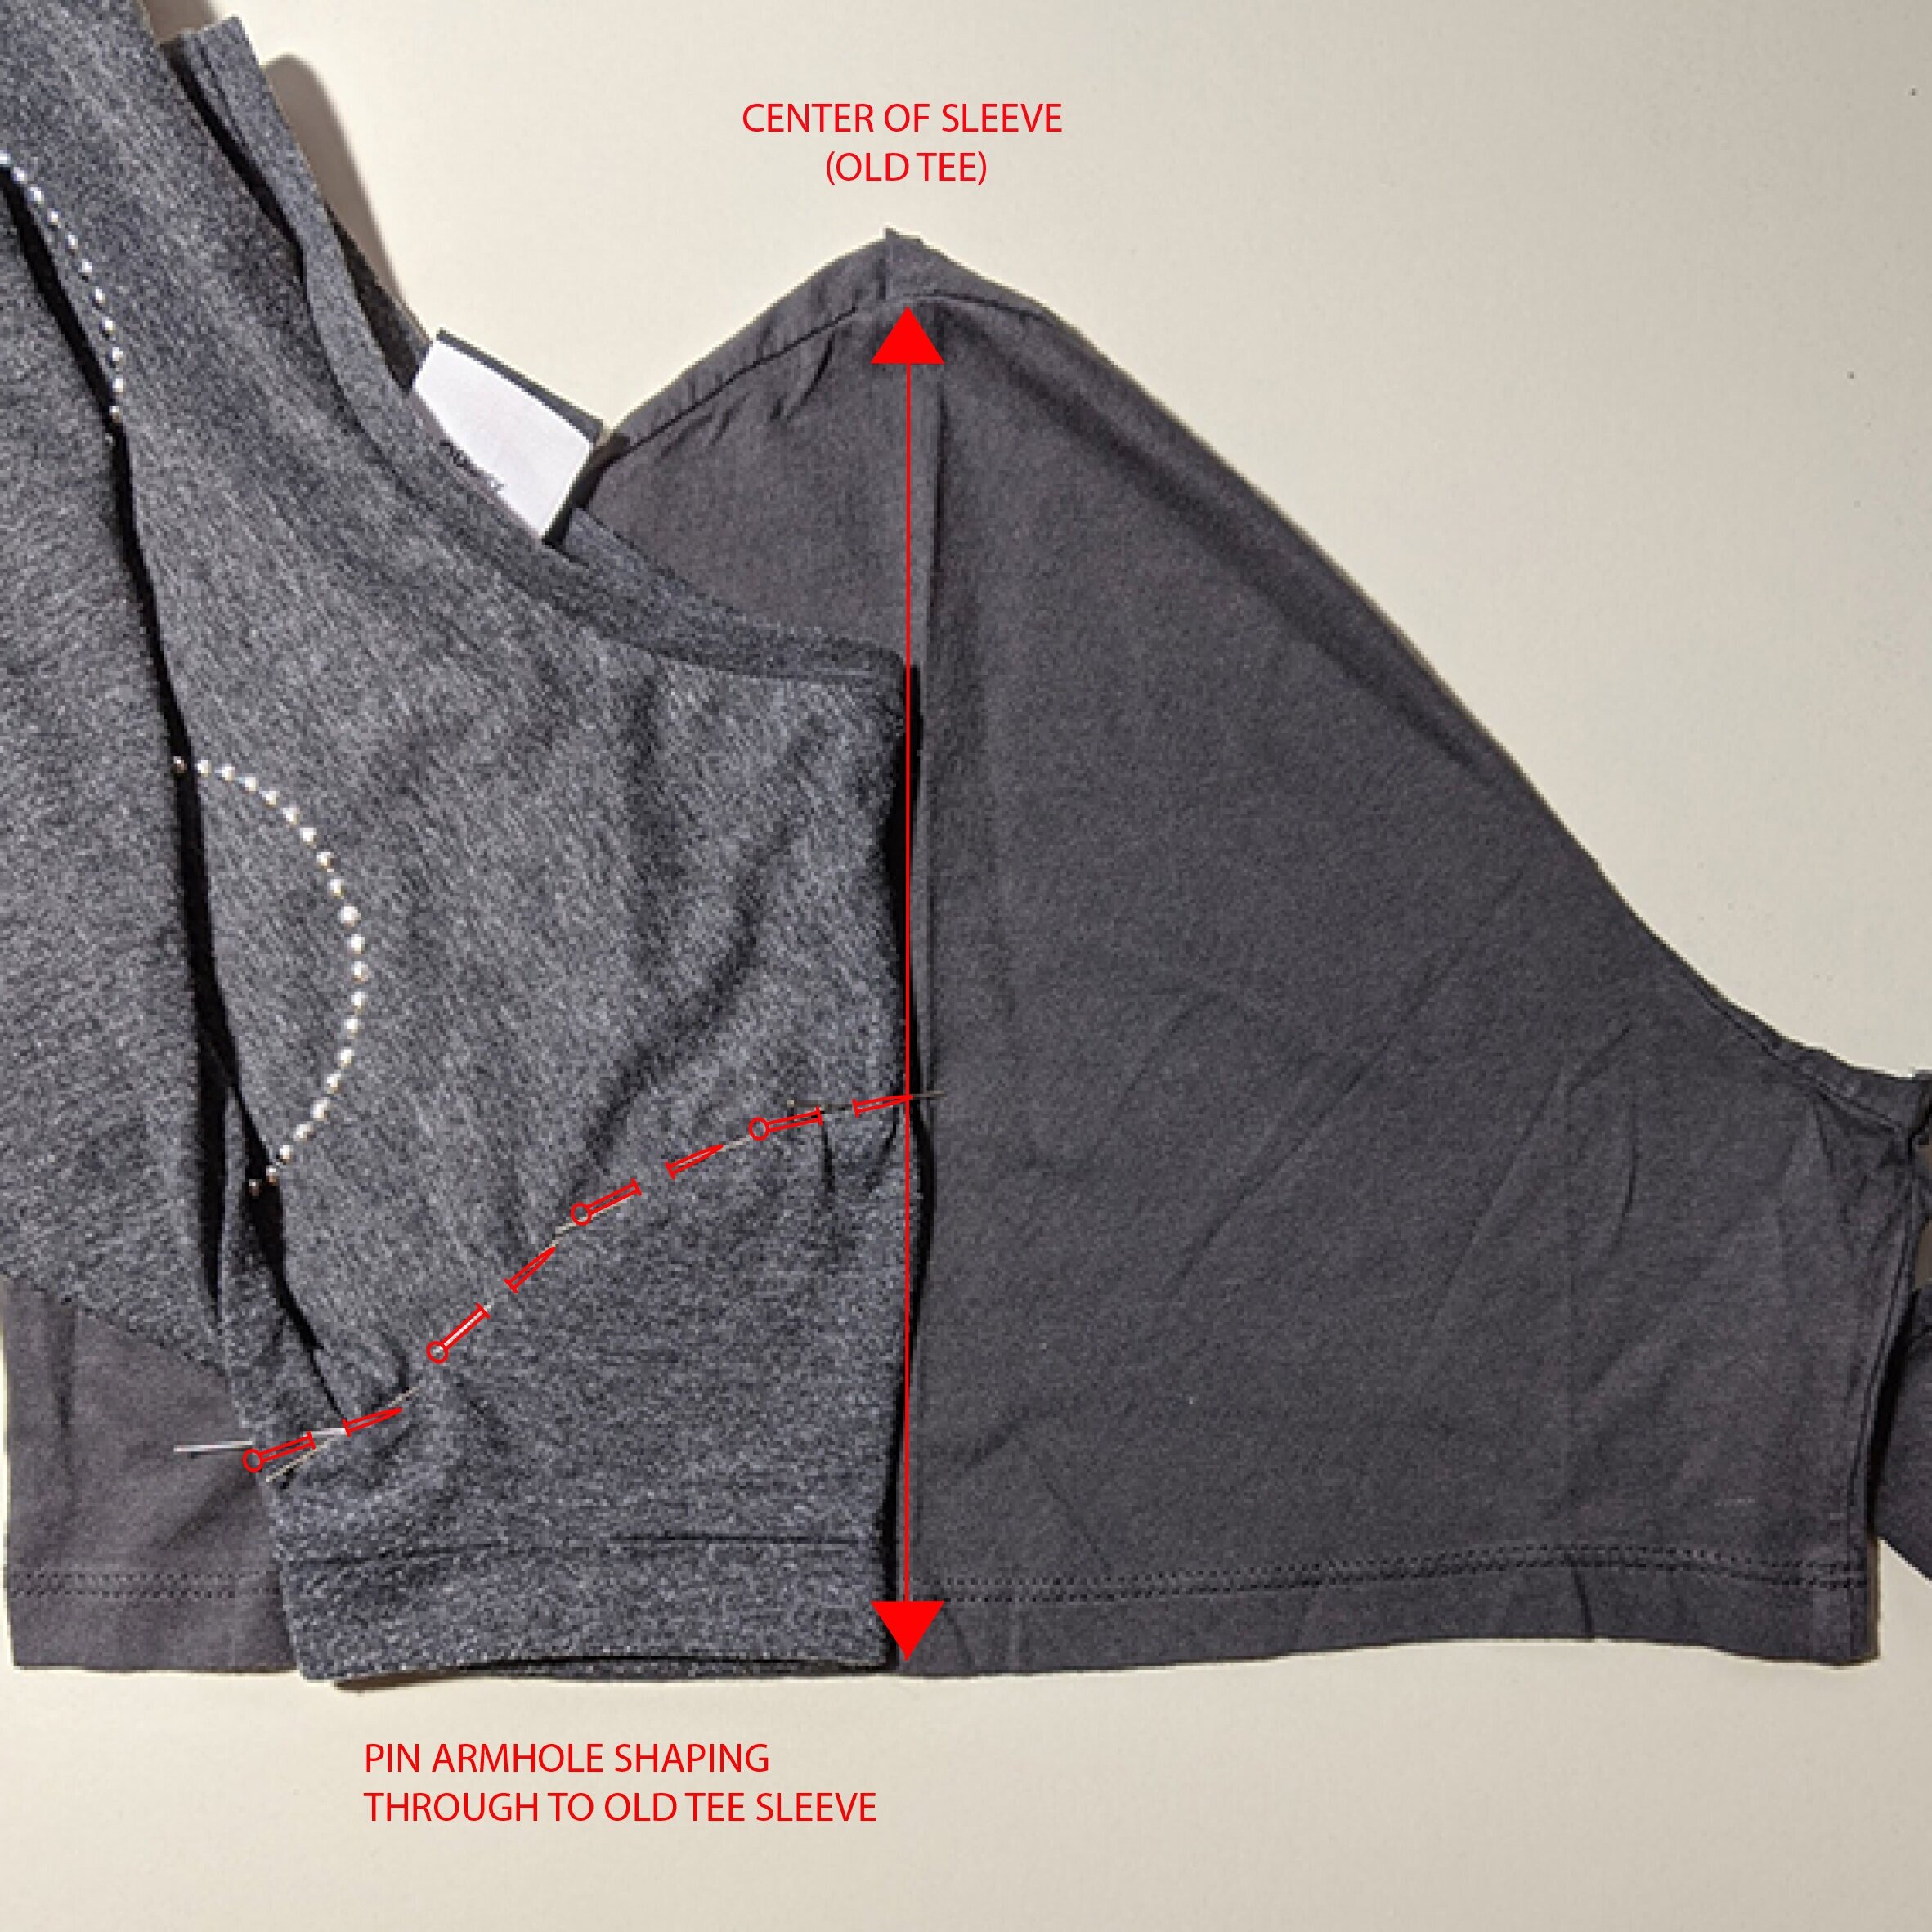
Lay out the old tee sleeves one by one and using the sample tee place the sleeve flat and in line with the center of the sleeve and the hem. NB: If you use the hem of the old tee, you won’t need to hem your upcycle! Pin or draw in the correct shaping of the armhole.

Using the pins of the seamline as a guide trim away the new armhole, with 1cm seam allowance included. Also include 1cm at the underarm seam.

Fold the sleeves at the center of the (old tee) sleeve and mirroring the side you have already trimmed, trim the opposite side.
Repeat this with the other sleeve. And sew each underarm seam together.

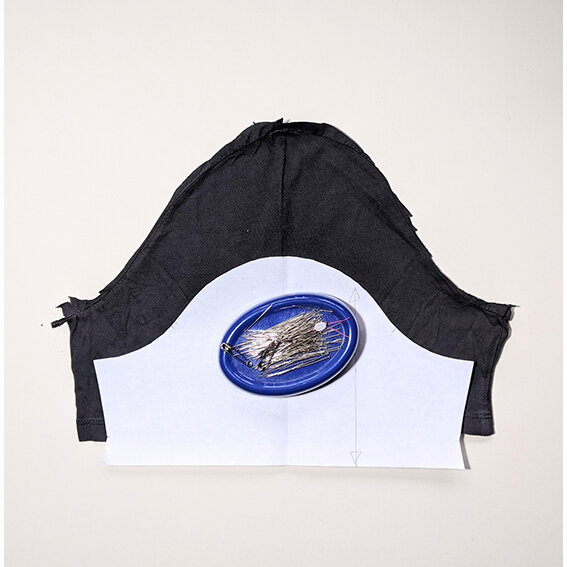
This optional extra is great if you have some good scraps long enough. We used double gause measuring an 50% longer than the hem of the tee we were making. If using an overlocker/serger we suggest using this to hem the garment as it fits well with the rock aesthetic. However, if you would rather hem the peplum then do so at the end of the make. Sew the side seams together and then add gathering stitches to the top edge to reduce the circumference to match the circumference of the tee hem.

Pin and sew sleeves and peplum into place.

Lastly add the neckline, this can be done with excess from the original tee, or with a fab new contrast jersey from your scrap bag!
Measure the neckline of your new tee. The easiest way to do this is to lie the tee flat with the CF and CB at either end, as shown, then double for the circumference.

Using the measurement you have, (making sure you have doubled it to make the circumference,) reduce the length by 2-3cm depending on the amount of stretch in your stretch fabric. Most jerseys stretch 20% so you can afford to reduce by 3cm, this is worth testing by pinning to your garment. And for further help on necklines see our other online tutorials.
Using a ruler/pattern master create a neckline piece that is the new required length x 4cm depth. The depth should be parallel with the grainline on your fabric when you cut it out.

Press the neckline in half lengthways. Then reopen, and sew together the ends of the neckline which will become the CB seam. Fold back into place, and then pin the neckline onto your garment. Again, for further help with this see our online tutorial for sewing jersey necklines.
Once attached give the neckline a really good press, avoid using too much steam as this can burn jersey and discolour it.
So there you have it!! one fabulous, upcycled rock tee for your little loved one!
And to anyone out there who loves this idea, but the instructions below just blow your mind you can also consider using one of our tee shirt patterns.
Blake for 1-11 year olds or Lux for 0-24 months. All you need to do is follow the 3rd instruction above about cutting the original tee into separate pieces: front, back and 2 sleeves. Then you can lay the pattern pieces on top.